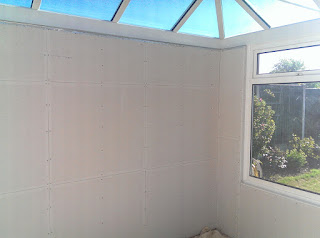
After
years of experience, I can make plastering a wall or ceiling look
easy and effortless. When done well, smooth creamy plaster glides
onto the surface and dries out evenly and perfectly flat. Hers's the
first of 5 top tips that won't turn you into a Master Plasterer
overnight, but will make plastering a wall or ceiling less tricky in
the future.
Plastering Tip 1: Ensure your surface is properly prepared before plastering
Plastering Tip 1: Ensure your surface is properly prepared before plastering
Plaster
will not adhere securely to any surface that is damp, dusty,
wallpapered or unstable without some prior preparation. You must
remove any loose areas of existing plaster, dust or paper. Next, the
surface must be treated with a mixture of PVA glue and water (this
should be 3 parts PVA to 1 water). Allow to dry until the surface
becomes tacky, then apply the first coat of
plaster
Plastering
Tip 2: How to mix your plaster perfectly
Mixing plaster is not "rocket science" but there are some basic rules to follow. Always use clean water to mix the plaster as any contamination can cause the plaster to go off before you've applied it. You MUST always add the plaster to the water (on roughly a 50:50 basis so half a bucket of water will make a full bucket of plaster).
My top tip is to first add just enough plaster so that it heaps on top of the water and mix in until lump free. Then add smaller amounts of plaster by hand until the consistency is smooth and lump free ("like melting ice-cream")
A great way to test the consistency of the mix is by standing a stick in the mix....if the stick can stand on its own then the plaster is mixed perfectly.
Plastering
Tip 3: Don't try to take on too much!
When attempting to plaster for the first time - it's good to start on a small wall - i.e. an area that can be covered with a single coat in 20 minutes or less.
Don't try and get the surface perfect during this first coat. Allowing the plaster to dry before applying the second coat will greatly improve the final finish. Using this technique not only makes plastering quicker but you will end up with a better finish every time.
Plastering
Tip 4: Cleanliness is key to creating that perfect plaster finish
The best tip I was ever given while learning the trade is to always clean up as you're plastering. Let me explain: Any contamination in your plaster mix will result in either the plaster setting or going off too quickly, and since plastering is generally a race against time, anything that reduces the time you have to complete your job is ultimately going to cause more work than less. Therefore it is essential that buckets and equipment are washed up as you go.
Remember, even the tiniest fleck of dried plaster from a previous mix can cause pulls and drags in your plaster finish and lead to frustration. Always ensure the water used for plastering is clean.
Plastering
Tip 5: Get the perfect finish - but don´t over polish
The perfect plaster finish looks and feels like eggshell, and there is one very important reason for this - paint and wallpaper will peel away from a highly polished surface.
On the final trowelling DON´T get carried away - you don´t want the situation where paint will peel easily in some areas and stick rock hard in others - completely ruining the plaster finish. www.plastering4u.com


