Walls & Ceiling Plastered In Kitchen

Showing posts with label plaster. Show all posts

Sunday, 12 November 2017

Plastering the conservatory wall

The brick wall of this conservatory of a home in Broadstairs, Kent needed to be plastered. Steel angle beads were fitted to the corners, before laying first a backing plaster coat and then a plaster finish coat.

                                               www.plastering4u.com

Wednesday, 30 August 2017

Ceiling Prepared and Plastered

This damaged ceiling in a front room of a home in Margate, Kent has been repaired and plastered.

                                               www.plastering4u.com

Wednesday, 26 October 2016

The Art of Plastering

Here's the third of my plastering tips.

Plastering Tip 3: Don't try to take on too much!
When attempting to plaster for the first time - it's good to start on a small wall - ie an area that can be covered with a single coat in 20 mins or less.
Don't try and get the surface perfect during this first coat. Allowing the plaster to dry before applying the second coat will greatly improve the final finish. Using this technique not only makes plastering quicker but you will end up with a better finish every time. 

                                              www.plastering4u.com


Tuesday, 29 September 2015

Laying The Base Coats

The exposed brickwork has now had 2 base coats of a sand & cement mixture applied. When this top coat is dry and hard (normally takes between 1 - 3 days), I'll lay a finish coat plaster over the whole wall area.
                                          www.plastering4u.com

Saturday, 15 August 2015

The Art Of Plastering

After years of experience, I can make plastering a wall or ceiling look easy and effortless. When done well, smooth creamy plaster glides onto the surface and dries out evenly and perfectly flat. Hers's the first of 5 top tips that won't turn you into a Master Plasterer overnight, but will make plastering a wall or ceiling less tricky in the future.


Plastering Tip 1: Ensure your surface is properly prepared before plastering
 Plaster will not adhere securely to any surface that is damp, dusty, wallpapered or unstable without some prior preparation. You must remove any loose areas of existing plaster, dust or paper. Next, the surface must be treated with a mixture of PVA glue and water (this should be 3 parts PVA to 1 water). Allow to dry until the surface becomes tacky, then apply the first coat of plaster 

Plastering Tip 2: How to mix your plaster perfectly
 Mixing plaster is not "rocket science" but there are some basic rules to follow. Always use clean water to mix the plaster as any contamination can cause the plaster to go off before you've applied it. You MUST always add the plaster to the water (on roughly a 50:50 basis so half a bucket of water will make a full bucket of plaster).
My top tip is to first add just enough plaster so that it heaps on top of the water and mix in until lump free. Then add smaller amounts of plaster by hand until the consistency is smooth and lump free ("like melting ice-cream")
  A great way to test the consistency of the mix is by standing a stick in the mix....if the stick can stand on its own then the plaster is mixed perfectly. 

Plastering Tip 3: Don't try to take on too much!
When attempting to plaster for the first time - it's good to start on a small wall -  i.e. an area that can be covered with a single coat in 20 minutes or less.
 Don't try and get the surface perfect during this first coat. Allowing the plaster to dry before applying the second coat will greatly improve the final finish. Using this technique not only makes plastering quicker but you will end up with a better finish every time. 

Plastering Tip 4: Cleanliness is key to creating that perfect plaster finish
The best tip I was ever given while learning the trade is to always clean up as you're plastering. Let me explain: Any contamination in your plaster mix will result in either the plaster setting or going off too quickly, and since plastering is generally a race against time, anything that reduces the time you have to complete your job is ultimately going to cause more work than less. Therefore it is essential that buckets and equipment are washed up as you go.
 Remember, even the tiniest fleck of dried plaster from a previous mix can cause pulls and drags in your plaster finish and lead to frustration. Always ensure the water used for plastering is clean. 

Plastering Tip 5: Get the perfect finish - but don´t over polish
The perfect plaster finish looks and feels like eggshell, and there is one very important reason for this - paint and wallpaper will peel away from a highly polished surface.
On the final trowelling DON´T get carried away - you don´t want the situation where paint will peel easily in some areas and stick rock hard in others - completely ruining the plaster finish. www.plastering4u.com

Monday, 13 April 2015

Plaster Ceiling & Walls

At a property in Ramsgate, Kent, the walls and ceiling of this back room needed to be repaired & plastered.

                                   www.plastering4u.com

Wednesday, 3 September 2014

Plastering An Artex Ceiling

One of the most common jobs we undertake is to plaster over an artex ceiling. A recent example is one we did in Margate, Kent.


                                           www.plastering4u.com

Saturday, 10 May 2014

Plastered Wooden Lathes

The plaster on this wall was cracked and had come away from the wooden lathes. New plaster was applied resulting in a nice smooth finish.


Friday, 9 May 2014

The Art Of Coving

Plaster coving can be fitted to most rooms by following these steps:
1) Mark exactly where you want the coving to sit. Do this by using a short length of coving – say 100mm – to act as a template. Mark the top and bottom of this template at regular intervals along the wall, then join up using a straight edge to create your guide.
2) Then score between the pencil guidelines to give you a good key for the adhesive.
3) Start on the longest wall in a corner. Use a mitre block and a saw to cut the coving's end at a 45° angle, sanding off any rough edges.
4) Spread coving adhesive over the back of the first piece of coving, manoeuvre into place between your marked lines. Press along the length so the adhesive sticks firmly.
5) Any excess adhesive that oozes out can be removed with a damp sponge.
6) Continue working your way around the room butting one piece up against the next.


Monday, 25 November 2013

Advantages Of Lime Plastering

There are many advantages to using Lime Plaster but the most impressive are its breathability and flexibility making it very useful for conservation and older buildings.

Breathable

Lime plaster will allow moisture to easily pass through whereas cement will trap and prevent moisture from escaping, leading to a greater problem - gradually building and then ultimately forcing the damp to come out elsewhere.

Flexible
Whilst cement based plasters and renders are strong in compressive strength they lack greatly in flexibility. Any movement can easily result in the very strong cement based plaster cracking and if used externally will allow the ingress of water and damp. Then the damp will be trapped behind a non breathable render. 
So while lime is not as hard, it's more flexible, so suited for use in an older buildings. 

In this room the ceiling was plasterboarded and skimmed using normal plaster. All the walls were plastered using Traditional Lime Render and Lime Finish Plaster.


Monday, 12 March 2012

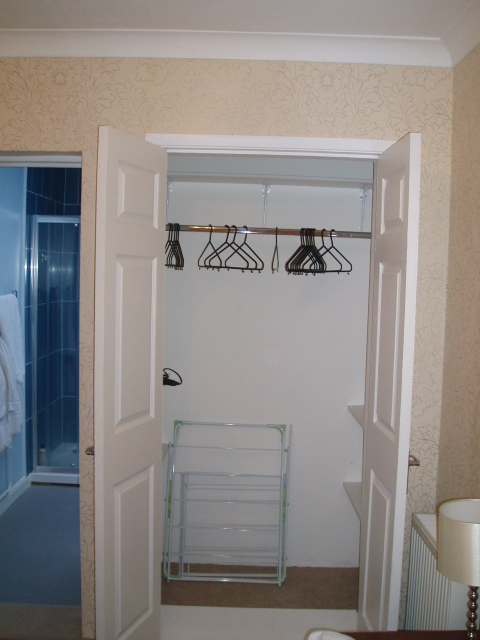
Built In Wardrobe

These photos show how I had to build & plaster a wardrobe for a bedroom to create more storage space.


Wednesday, 29 February 2012

Plastering An Arch

Creating and plastering an arch is a task I always enjoy. In this project I also had to plaster the walls & ceiling and tile the floor.